
Roofing may seem simple from the driveway, but success begins before the first shingle is removed. A good plan keeps your house dry, safe, and quiet. In this blog, you’ll discover how to budget, select materials, verify codes, schedule the project, and hire a crew. We’ll also touch on safety, ventilation, and the little things that keep water out (flashing, drip edge, sealants). Consider this your field guide: straightforward, practical, and designed for real homes in real weather. You’ll walk away knowing what to ask, what to expect, and how to guide the job to a stress-free completion.
Define Your Scope
Scope first. List what you want repaired or replaced, from the deck to the ridge cap. Determine if it’s a repair or a tear-off. Check house age, ceiling stains, and prior hail/wind claims. Get a safe ladder view, or request drone photos from a pro. Calculate the roof in “squares” (100 sq ft each) to determine material requirements. Verify pitch; 4:12 to 6:12 suits most asphalt shingles, low-slope areas might require membranes. Note chimneys, skylights, vent stacks, valleys, and dead-end walls that need special attention. A written scope allows contractors to bid apples-to-apples and allows you to compare bids without guessing.
Build a Realistic Budget
Prices vary by size, pitch, access, and material. Create a line-item budget: tear-off, disposal, deck repair, underlayment, shingles or panels, flashing, vents, labor. Get prices for upgrades separately so you can decide in peace. Tips:
- Allow 10–15% for concealed deck rot.
- Compare warranty, wind rating (ASTM D7158 Class H ≈ 150 mph), and algae resistance.
- Verify the quote includes permits, site cleanup, and a magnetic nail sweep.
- Set a payment schedule: deposit, progress draw, and final after inspection.
Also, review allowances for wood replacement by the sheet or linear foot. A clean budget prevents last-minute add-ons and shows where spending a little more gives real, long-term value.
Know Permits and Codes
Roofs must follow local rules. Before work begins, confirm permit needs and inspection steps. Many areas reference the International Residential Code (IRC) Section R905 for steep-slope roofs. Common rules include:
- No more than two shingle layers before tear-off.
- Ice and water shield at eaves in cold zones (often two feet inside the warm wall).
- Drip edge required at eaves and rakes.
- Attic ventilation is sized by a net-free area (often 1:300 of the attic floor).
Your contract should list the code items for your job and who pays the fees. Ask for photos of key checkpoints—deck condition, underlayment laps, nail patterns, and flashing—so you have a record. Staying on code protects resale, insurance claims, and your roof’s long life.
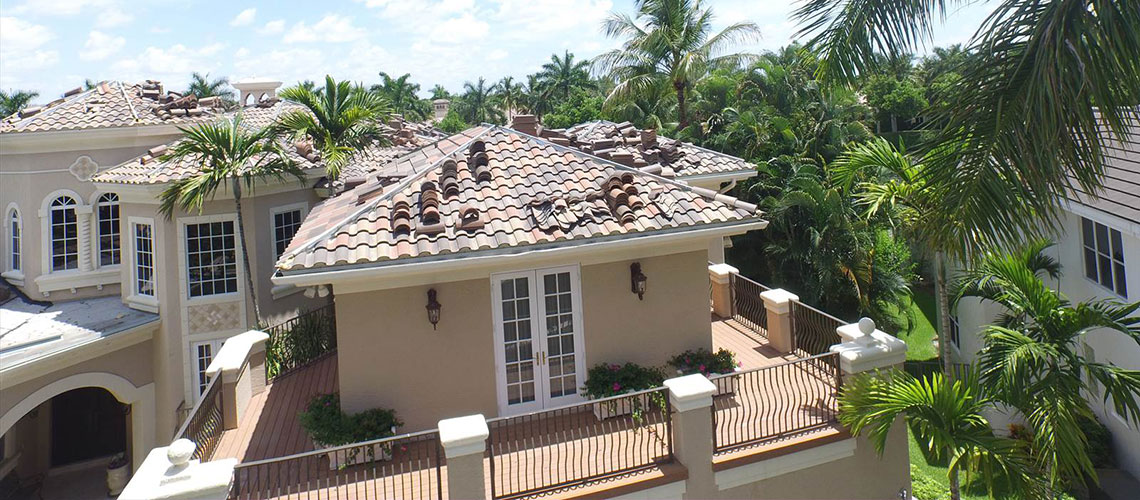
Choose the Right Material
Material choice shapes cost, look, and lifespan. Popular options include:
- Asphalt shingles: 3-tab (budget) or architectural (thicker, better wind rating).
- Metal panels: standing seam or ribbed; long life, sheds snow, and is lightweight.
- Clay or concrete tile: heavy and durable; confirm framing can carry the load.
- Synthetic slate or shake: lighter than stone or wood with a classic style.
Compare fire ratings (Class A is common), hail impact ratings (UL 2218 Class 4 resists dents), and solar reflectance (cool-roof choices lower attic heat). Ask about underlayments: felt, synthetics, and peel-and-stick membranes for valleys and at eaves. Matching material to climate and roof shape often matters more than the logo on the wrapper.
Focus on Leak Details
Water always finds the weak spot. Flashing is the metal that seals where roofs meet walls, chimneys, dormers, and skylights. Look for:
- Step flashing at sidewalls and counter-flashing at chimneys.
- W-valley metal or ice shield in valleys.
- Kickout flashing to steer water away from the siding.
- Drip edge with 1/4–3/4 inch overhang into gutters.
Underlayment should lap correctly; fasteners need the right length to reach the deck without punching through too far. Ask for six nails per shingle in high-wind areas, and check that nails are placed above the seal strip. Closed-cut valleys fit many homes; open metal valleys help with heavy runoff. These small details stop leaks long after the crew leaves.
Ventilation and Insulation
Ventilation and insulation help your roof last. Heat and moisture shorten shingle life and can invite mold. Aim for balanced intake and exhaust:
- Intake: soffit vents clear the eaves.
- Exhaust: ridge vents or box vents near the peak.
A common guide is 1 square foot of net free vent area per 300 square feet of attic floor, split roughly half intake, half exhaust. Seal big attic air leaks around lights and bath fans before reroofing. If you add spray foam or change the ventilation style, install baffles to keep airflow along the deck. Cooler attics mean fewer ice dams, less shingle curl, better indoor air, and lower bills through summer and winter.
Plan for Safety on Site
Roof work is risky. Confirm the crew’s safety plan and insurance. Key checks:
- Active liability coverage and workers’ comp.
- Fall protection: harnesses, anchors, and guardrails on steep slopes.
- Ladder setup: tied off and three feet above the eave.
- Weather plan: secure tarps; pause in high wind or lightning.
Ask who supervises daily and how your yard will be protected—plywood over AC units, boards along shrubs, and a clear path for debris. Noise is normal; plan pet care and parking. Confirm where materials will be staged and how walkways will stay open. A safe job protects workers and your home and keeps the schedule steady from start to finish.
Select a Trustworthy Contractor
Choosing a contractor is about more than price. Ask for recent local jobs you can view from the street. Verify license status and any factory training for your material. Smart questions:
- Who handles permits and inspections?
- What is the crew size and typical timeline?
- How are change orders handled and priced?
- What happens if rain hits mid-project?
Check references and local trade groups or the BBB. Read the contract: scope, start and finish windows, materials by brand and model, and cleanup steps. Confirm disposal method and whether trailers or dumpsters will sit on driveway pads. Clear terms turn a big project into an organized, predictable week.
Schedule and Daily Workflow
Timing affects quality. Dry, mild weather helps adhesives set and keeps decks dry. In hot months, shingles seal fast, but crews need more breaks; in cold months, adhesive strips may take longer to bond. Protect openings with tarps at day’s end and keep plywood ready for sudden deck repair. Ask for a daily plan:
- Tear off only the sections scheduled for that day.
- Dry-in with underlayment the same day.
- Finish valleys and penetrations before moving on.
Agree on start times, noise windows, and parking. These habits reduce exposure if a storm surprises everyone. A steady, organized pace beats rushed starts and stops and gives consistent results.
Think Ahead: Solar and Water
Modern roofs can team up with solar or rainwater systems. If you plan panels, ask for a layout now to avoid vents where rails will go. Many solar racks fasten to rafters; use flashed mounts under the shingles, not surface caulk. Plan conduit runs before shingles go on. For rainwater, wider gutters, leaf guards, and strategically placed downspouts divert water away from the foundation. Slope gutters 1/16–1/8 inch per foot, size outlets for heavy rain, space hangers 24–36 inches apart. Think about replacing the skylight while the deck is open. These little decisions in roofing save you from drilling, patching, and mess later.
Simple Steps, Strong Roof
A roofing job is all about making the right little decisions. Begin with a defined scope, budget, and code-compliant design. Select materials appropriate for your climate, and pay special attention to flashing, ventilation, and job-site safety. Choose a contractor who communicates and puts everything in writing. Follow those steps, and you’ll safeguard your home, save yourself stress, and get a roof that endures. When you’re ready to explore options or receive a no-pressure quote, contact Morton Roofing for honest answers and reliable service.